Tuesday, 3 June 2014

New Catalogue

Get ready!  Stampin' Up has a new catalogue on its way!


There are lots of great goodies inside.  You will be able to view the catalogue online from July 1.  In the meantime, if you'd like to order your very own copy, let me know, and I can have it shipped straight to your door. 

That means - NOW is the chance to get your hands on the products that are retiring, and some at a great price.  Click on the link below to have a look. 


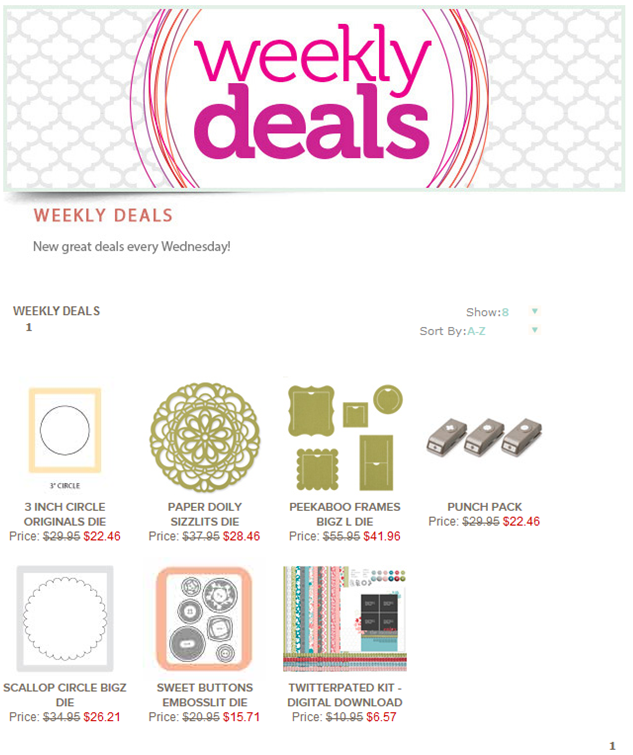
Don't forget Stampin' Up! are still doing their weekly deals.  Here is what is on offer this week (which ends Wednesday June 11).

http://www3.stampinup.com/ECWeb/ItemList.aspx?categoryid=955


If you'd like to order anything, I'm happy to help you.  Otherwise, visit the Stampin' Up! website and follow the prompts. 


Friday, 23 May 2014

Sketch Layout Challenge #10

This design was provided by Stacey at Rustic Squirrel Handmade, through the amazing Christy at A Christy Production who just keeps these things coming, and all of the designers busy, busy, busy!  ha ha jokes - it's fun to have a reason to craft!

Here it is!

Wow!  What a design.  I kept putting this one off, but I finally got there, and I must say I'm pretty pleased with myself - I can say that right?

Here is what I came up with:


I'm in the process of sewing some exciting new products (which I will reveal very soon).  The baby theme has been on my mind, so I continued with it when I made this card.

I used Crisp Cantaloupe, Sweet Sorbet designer paper series and some co-ordinating colours - pool party and Summer Starfruit.  The stamp set is Fox and Friends, which I'm loving!  I used Smoky Slate for the stamps.

A few little embellishments never go astray - pearls, twine and a cute brad I found in the bottom of my stash.


This was really fun to make! I'm looking forward to the next one :o)

If you'd like to join in and create your own cards, head on over the A Christy Production and give it a go!


Wednesday, 14 May 2014

Sketch Layout Challenge #9

Thanks again to A Christy Production for supplying the sketch layout for this month's challenge. Here is it!  Cute isn't it??


I'm loving Strawberry Slush at the moment so I decided to use that, along with some Daffodil Delight and Quatrefancy DSP.


Here's how I made my card:

stampin up


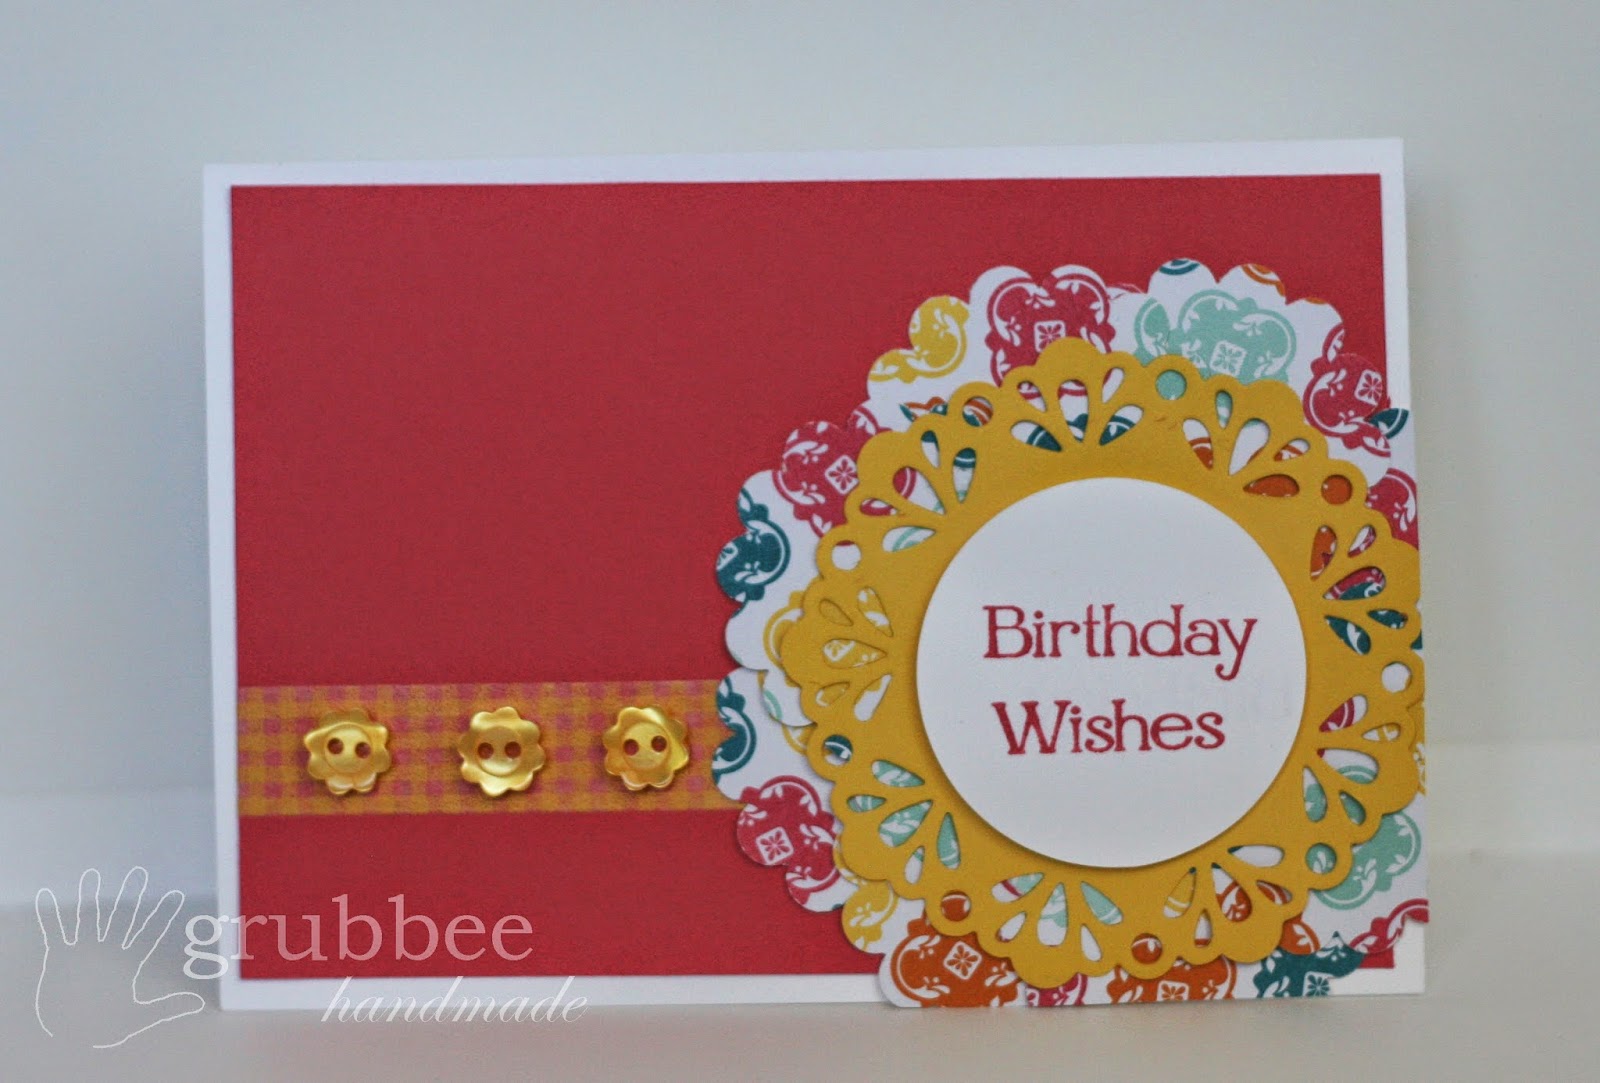
I folded 8" x 5-7/8" Whisper White card stock in half.  Cut 3-7/8" x 5-5/8" piece of Strawberry Slush card stock.  Taped a piece of Daffodil Delight Washi tape (from the Gingham Garden collection) and attached it before sticking the Strawberry Slush card to the Whisper White.

I used the Big Shot and the Delicate Doilies Sizzlit die to make the daffodil delight doily.

Then I punched 8 scallops (1-3/4") from the Quatrefancy Specialty DSP and positioned them in a circular shape behind the doily.  This was much harder than I thought it would be and took me quite some time to get them right.  They're still not perfect.


The Birthday Wishes sentiment is from the Four You stamp set.  It is stamped with Strawberry Slush classic ink onto Whisper White card stock and is punched out using the 1-3/4" circular punch.  I attached this with a dimensional to give it some lift.

Lastly I used 3 Daffodil Delight buttons.  I would have loved to have used something in Island Indigo to match the DSP, but I didn't have anything, so Daffodil Delight it was. 


Monday, 5 May 2014

Sketch Layout Challenge #8

I have been participating in these Sketch Layout Challenges set by my friend over at A Christy Production.

This was the sketch challenge set this time around:

As I am fairly new to Stampin' Up! and am still building my supplies,  I used Daffodil Delight instead of Crushed Curry - but you can hardly tell!

To make this card I used Crumb Cake as the base ( 14.8cm x 10.5cm) Rich Razzleberry for the second layer (13.8cm x 9.5cm) and Whisper White as the final layer (13.2cm x 9 cm)

I used my 1-1/4 inch circle punch for the circles, using Daffodil Delight card stock and DSP, Rich Razzleberry and Crumb Cake card stock.  I have also used a balloon punch (not Stampin' Up!) which I just LOVE! They are secured with dimensionals to give the card a bit of a lift.  

I have used 2 silver buttons and some Daffodil Delight pom poms.

The Birthday Wishes sentiment is from the Four You stamp set and is stamped with Rich Razzelberry.  

I love these challenges because half the work is already done for you - the layout and the colours! All that's left to do it find a little bit of creativity.  I am starting to find my groove, but still have a ways to go. 

Check out the rest of the great card designs HERE.

Saturday, 26 April 2014

Treat Box Tutorial

The perfect way to say thank you!

This treat box can be adapted to suit any occasion including birthdays, bridal and baby showers, Easter and Halloween.


You will need:

  • Card stock or DSP paper 
  • Whisper White card stock
  • Double sided tape
  • Dimensionals
  • A food safe bag
  • Coordinating ribbon or twine
  • 1-3/4 inch scallop punch
  • 1-3/8 inch circle punch
  • Greeting of your choice
  • Coordinating ink pad
Directions:

1.  Trim your paper to make a 5inch x 10inch rectangle
2.  On the short edge, score at 1.5 inches
3.  On the long edge, score at 8.5 inches, 5.5 inches, 4 inches and 1inch as seen in the picture below.

 4.  Cut along the red lines as shown below, cutting out the 1 inch x 1.5 inch rectangle on the corner.


5.  Use edging scissors or your paper trimmer with a rotary blade to make a patterned edge on the top of your box.


6. Fold along the remaining score lines.


 7.  Attach double sided tape to the larger flaps as shown below.  Using two pieces of tape (one near  the fold and one near the edge) will secure the box better.  Also place tape on the 1 inch edge to help close the box as you fold it around


8. Seal it all up! If you have used DSP or other designer paper, you will be able to pinch the sides in a little to give it a different look.  If you have used card stock, it is a little bit thicker and won't pinch in as well, but give it a try!


9.  Fill your bag with whatever you like, or just pop the goodies straight into the box.  Use coordinating ribbon or twine to finish it off.


10.  This next step is optional, but does look great.  Using the scallop punch and coordinating paper (in this case, I just reversed the paper) make a little tag for the front of your bag.  Choose a sentiment that matches your special occasion and stamp it on to some whisper white card stock.  Punch it out using the circle punch and attach it to the scallop shape already punched out.  Attach to your box with double sided tape or dimensionals for a little bit of a lift.

And there you have it, a simple, and beautiful treat box!


Monday, 21 April 2014

Birthday Cards

I often need to make birthday cards in bulk, and by bulk I mean 30-40 at a time!

Here are a few of my latest creations using Stampin' Up! products.  They are nice and simple, easy to make in mass quantities yet still pretty cute.


Products used:

Whisper white card stock
Lucky Limeade card stock (retired)
Petal Parade stamp set (from the sale-a-bration catalogue)
Four You stamp set
Ink pads: daffodil delight, lucky limeade, island indigo and Versa mark (on the lucky limeade strip).

 Products used:

Whisper white card stock
Island Indigo DSP
Lucky Limeade card stock (retired)
1-3/4 inch scollop circle punch
1-3/8 inch circle punch
Four You stamp set
Ink pads: lucky limeade and daffodil delight


Products used:

Whisper white card stock
Summer Starfruit DSP
Marina mist card stock
Real red ink pad
1-3/4 inch scollop circle punch
1-3/8 inch circle punch
Four You stamp set

Easter gift pouch tutorial

This simple Easter gift takes no time at all and looks so cute!


You will need:

  • 1/4 sheet 12x12 inch designer series paper (DSP)
  • Double sided tape (optional)
  • bone folder
  • miniature Lindt Easter bunny 
Directions:

 Cut the 12x12 inch paper into a 6x6 inch square


 Fold the square in half and crease with the bone folder to make the fold nice and sharp.


Fold one corner over to the midway point of the opposite side of your triangle.


Fold the other side over  matching up the fold to the other side.  If you would like to secure it with double sided tape, this is the time to do it.  After the next step however you will see that you don't really need to use the tape.  It's totally up to you!


 Finally, fold one half of the top piece down over the flaps you have just created. 


There you have it, a nice little paper pouch, perfect for any little treat!


You might also like:

Related Posts Plugin for WordPress, Blogger...